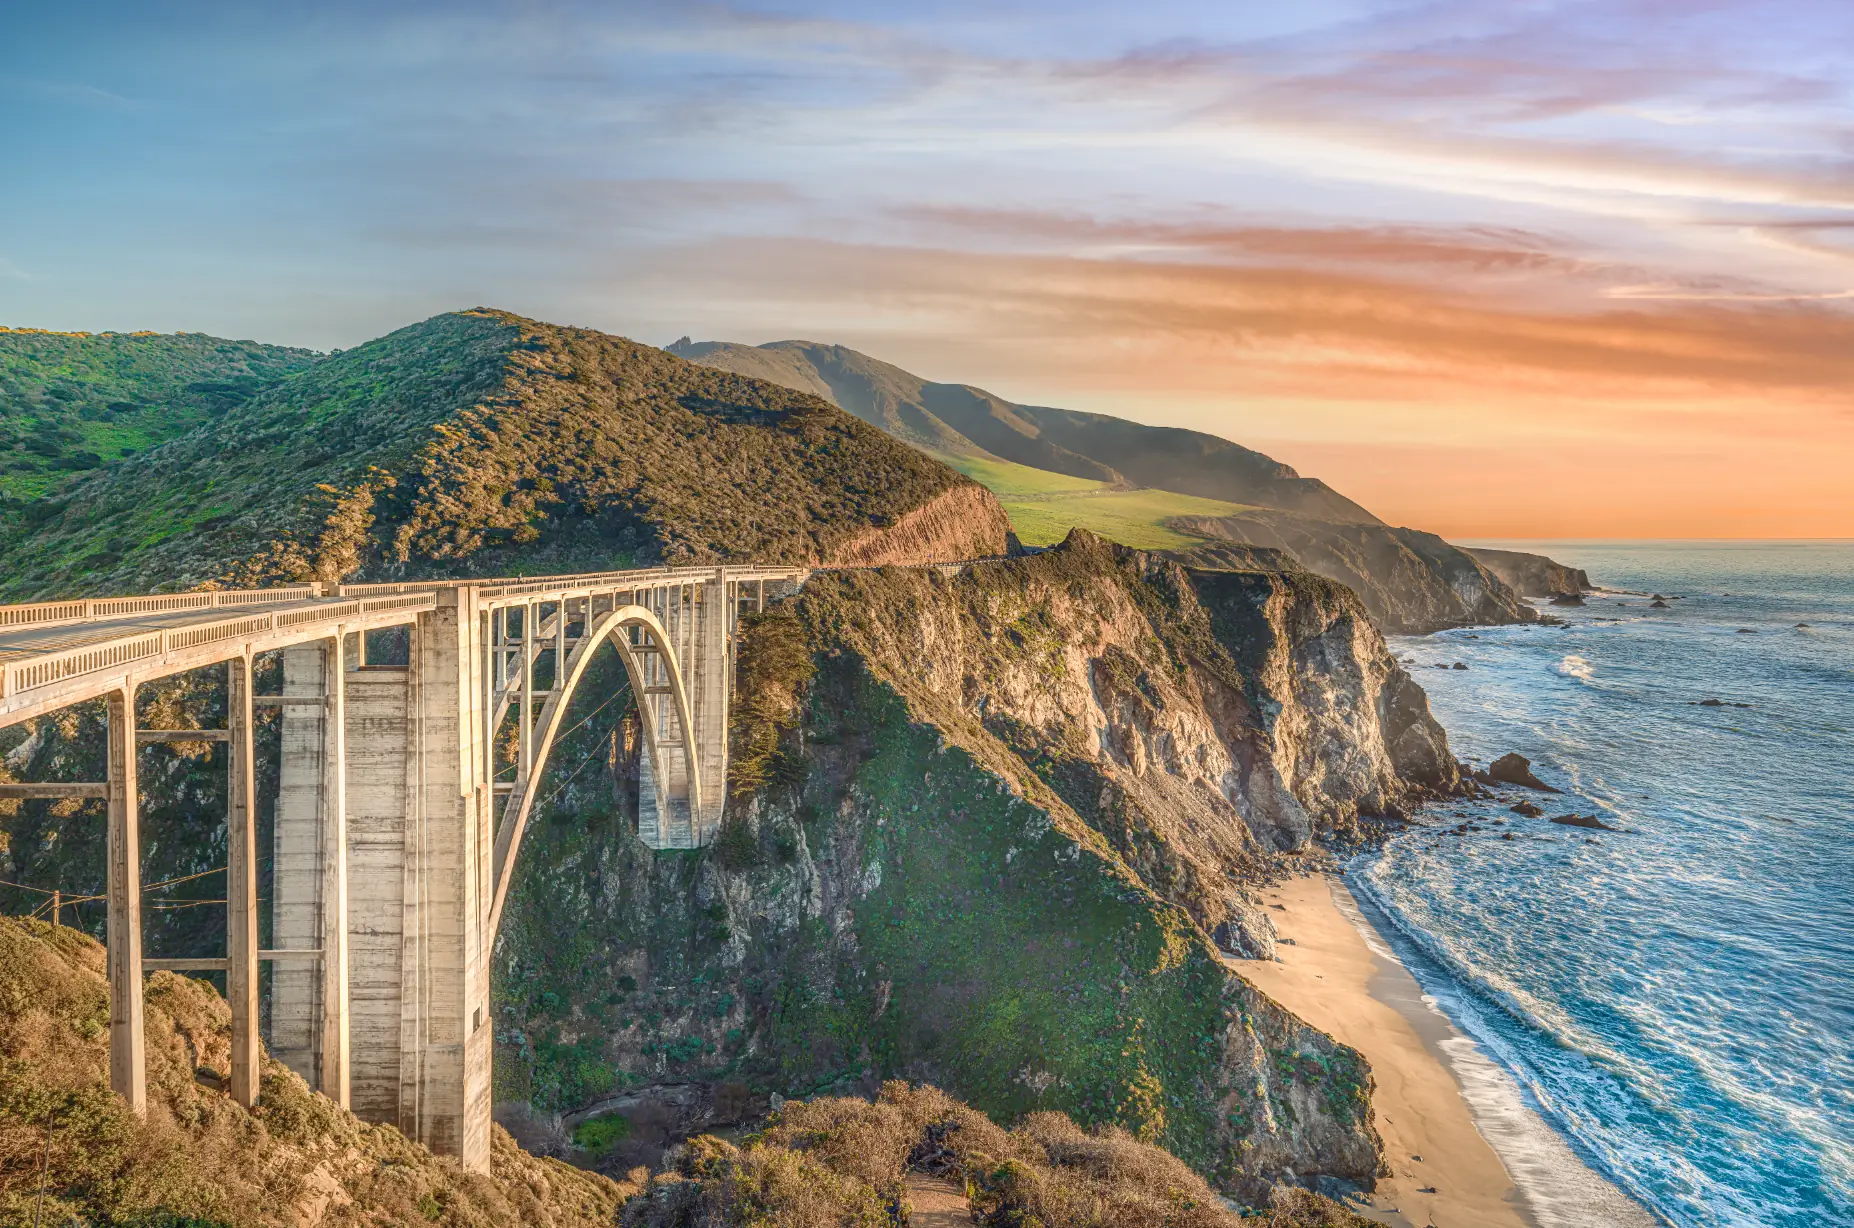
As a photographer, there's nothing more exhilarating than capturing the beauty of nature with your camera and sharing it with the world. I had the privilege of photographing the stunning Bixby Bridge on the iconic Highway 1, just south of Carmel-by-the-Sea. The majestic bridge stands tall across the breathtaking coastline, with the shimmering Pacific Ocean as its backdrop. I captured the scene at sunset, when golden light illuminated the surroundings with a warm glow — and the resulting photo went on to sell as a 72-inch-wide giclée, printed in my own studio. Here's how the shot came together, and how you can make your own.
Choose the right equipment
The first step to a great photo is the right equipment. For Bixby Bridge, I used my medium format Fujifilm GFX 100S with the GF 23mm lens (I've since moved to the GFX 100 II, but the approach is identical). The 102-megapixel medium format sensor delivers an incredible level of detail and clarity — which is exactly what makes large prints like that 72-inch giclée possible. The GF 23mm's wide angle of view captures the full breadth of the bridge and coastline in one frame. Don't have medium format? Don't worry: a DSLR or mirrorless camera with a wide-angle lens will still make beautiful images here.
Scout the location
Visit the bridge at different times of day to get a sense of the light and the crowds. Bixby is one of the most photographed spots on the California coast, so midday can be busy. I recommend early morning or sunset, when fewer people are around — and at sunset, the light casts a warm golden glow across the bridge and coastline that's genuinely magical. As a photographer, you want to meet the bridge when the light is at its best.
Set up your shot
Use a tripod to keep the camera steady and give yourself room to fine-tune. Shoot in aperture priority or manual mode to control how much light enters the camera, and try different compositions — Bixby rewards experimentation. I suggest working it from multiple angles, including from both sides of Highway 1. Please stay behind the barriers; the classic views don't require risking the cliff edge.
Post-processing
I edited my Bixby frame in Adobe Photoshop, adjusting color and contrast to enhance the warm golden hues and the detail in the bridge structure. My advice after thirty years of retouching: less is more. You want the photo to look the way the evening felt — not over-cooked.
Share — and print — your photos
Social platforms like Instagram (@carmelsphotographer) are great for sharing your work and finding an audience. But nothing compares to seeing a landscape at scale on a wall. Selling that 72-inch Bixby giclée — captured on medium format, printed in-house on my 64-inch Epson — remains one of my favorite moments as a working photographer. If a print of the Big Sur coast belongs on your wall, the print collection is where to start.
Conclusion
Capturing Bixby Bridge was an unforgettable experience. Choose the right equipment, scout the location, set up deliberately, process with restraint, and share the results. With these steps, you'll come home with something worth printing. Happy pixel hunting!